DOVOH WG-3L Digital Angle Gauge Review
Hands-on review of the DOVOH WG-3L 3-in-1 digital angle finder with laser: three green beams, magnetic mounting, USB-C rechargeable, and one faint screen.

Reviewed by
Seb and Michelle
We've tested over 6,500 products in the last 5 years – collaborating with over 4,000 brands and bringing our style of reviews to multiple platforms. More about me →
This post contains affiliate links. I may earn a commission at no extra cost to you.
Quick Verdict
Press the button once, twice, three times, and you get one laser line, then the sides, then all three thrown perfectly at once. That magnetic back plate is the first one I’ve seen on a digital angle finder, and it’s the reason I’d keep this one on the bench. The only catch: the digital display is faint enough that it barely shows on camera.
Buy if you:
- Align picture frames or shelves across a sheetrock wall
- Work near magnetic surfaces and want lasers thrown across the room
- Set table saw or miter angles off an absolute zero reference
- Want a rechargeable USB-C tool instead of swapping batteries
Skip if you:
- Need to read the angle screen in bright light, mine was faint
- Only have concrete walls, the alignment pins won’t help you
- Just want a plain bubble level with no lasers or display
Clicking takes you to the seller's website. We may earn a small commission if you purchase, at no extra cost to you.
The Digital Angle on Magnetic Plates
Pull it out of the box and the first thing you notice is the back plate, magnetic, removable, and something I’ve never seen on a digital angle finder before. Stick it to any ferrous surface, press the laser button once, twice, or three times, and the beams go to work without you holding anything. That one design choice turns a handheld gauge into a hands-free reference point. If you want to see it in action, you can check today’s price on Amazon here.
Set it on a magnetic surface and you can throw out three different lasers. How do you do that? You literally press the button once. Boom, you’ve got one. Press it again, you’ve got the sides. One more time, all three at once. As you can see in the video, these are perfect thrown lasers.
What the DOVOH WG-3L Digital Angle Gauge Packs In
This packs three separate Class II green lasers, a digital angle readout to ±0.5°, and a spirit level in one tool. That’s the 3-in-1 part. The lasers are Class II green beams, and green is easier to see than the cheaper red ones. What I love is that even at a corner, the throw goes even further out into the corner, so if you’re aligning something on another wall, you can do that too.
Three Sides Are Magnetic, and That’s the Cool Part
Three sides plus the back are magnetic, which sounds like a spec-sheet footnote until you actually use it. I set it on a steel work surface, fired all three green beams, and walked away, the tool held position and threw lines to the opposite wall without me touching it. That shift from handheld gauge to fixed reference point is the whole game here, and no other angle finder I’ve handled pulls it off.
Then there are the little pins. We’ve all seen these before, but I was struggling to figure out why they included them. They fit right into the body so you never lose them and always have them at the ready. The real trick: grab the back plate, fit that little protruding hole in place, and suddenly you’ve got these little pin holes. If you’re putting picture frames all over a wall and you need the first one aligned with the rest, you pin the mount into the sheetrock or use the existing nail from your frame, attach the unit, and throw the laser anywhere you want. That’s fantastic for a job that usually eats up a lot of second-guessing. Doing tile work? It works perfectly for that too, just without the pins.
The Screen Is Faint, and I’ll Be Transparent About It
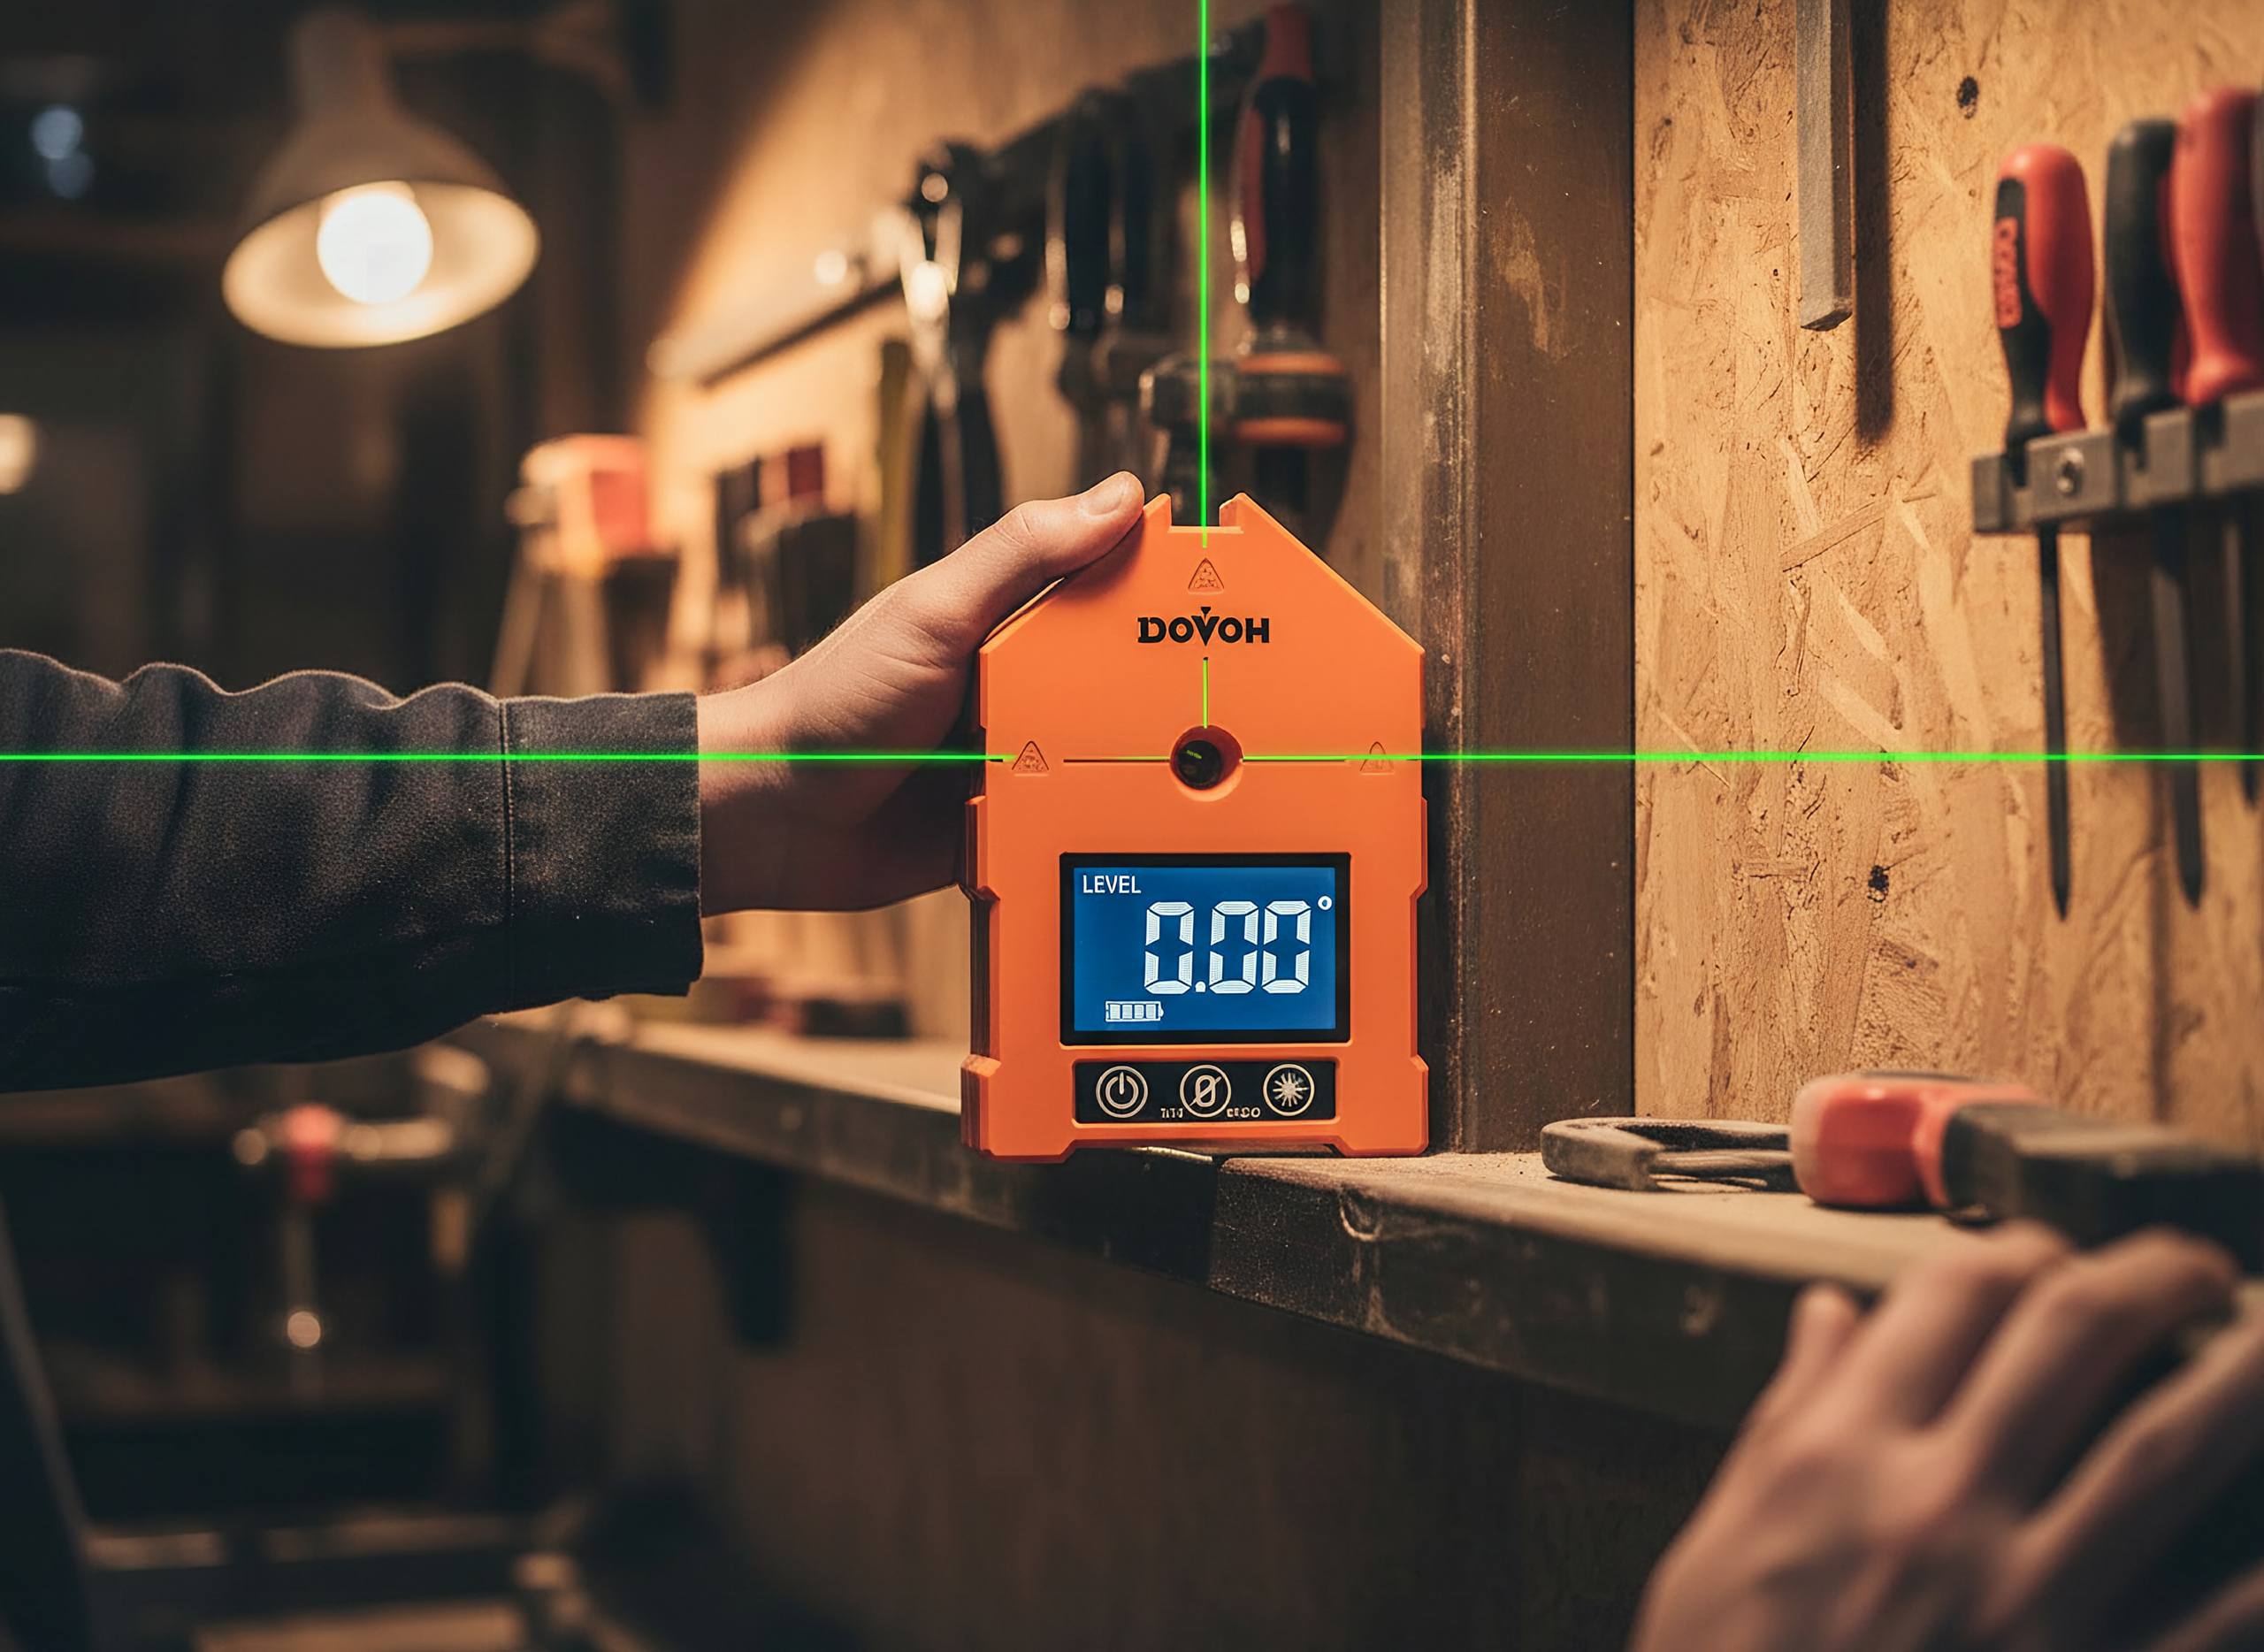
The digital angle display is faint enough that it didn’t register on camera, and in bright workshop light you’ll have to shade it to read it. There’s a tilt and hold, so when you turn it on and set it on an absolute zero surface, it’ll show 0 degrees. And when I say show, I mean it’s very faint. Maybe this is just my device, but I’ll be totally transparent here, I’m not seeing a very bright screen. If I pay attention, yes, I can see the absolute zero reading. But it did not show up on camera at all.
Why the reading matters: if I want to throw something at a 10, 15, or 17.2 degree angle, I can set that off my absolute zero and throw the laser at exactly that angle. That’s pretty cool for saw blade or miter setups. But you have to squint. In a bright workshop or outside, I’d expect that faint display to be a real hassle. It still works, I just wish it were brighter out of the box.
Get it now
DOVOH Digital Angle Finder With Laser
Get the best price on Amazon →This post contains affiliate links. I may earn a commission at no extra cost to you.

Who This Digital Angle Finder Is Actually For
Buy this if you’re hanging frames or cutting on sheetrock with magnetic surfaces nearby; skip it if your walls are concrete or brick and you don’t have metal to stick to. If you’ve got a wall of picture frames to line up in a North American house with sheetrock, this is built for you. Pin the mount, throw the laser, done. Tile installers get the same benefit without the pins, just the magnetic mounting and the laser lines.
One thing I ran into personally: I couldn’t fully demonstrate the pin trick because we live in the Caribbean and we have concrete walls pretty much everywhere. So if your walls are all concrete or brick, the pin-and-throw feature won’t do much for you, and you’ll lean on the three magnetic sides instead. Anyone setting saw blades or miter angles will appreciate the absolute zero reference, faint screen aside.
Setup Tips Before Your First Project
Charge it first. It’s rechargeable via USB-C, and the cable comes in the little case, so top it off before you count on it for a job. Second, learn the laser button rhythm early: one press for a single line, two for the sides, three for all three beams. It becomes muscle memory fast.
Get familiar with pulling the back plate off and seating the pins into it, because that’s not obvious the first time. Make sure the protruding tab locks into the hole before you rely on the pin holes. And when you use the digital angle display, do it somewhere you can shade the screen a bit, since the faint readout is easier to see out of direct light. Close it up in the case and it’s ready for the next project. You can grab it here on Amazon.
Pros
- Magnetic back plate plus three magnetic sides, the first design like this I’ve seen
- Three green beams thrown perfectly with one, two, or three button presses
- Laser throw reaches even further into corners for cross-wall alignment
- Pin-and-mount system is fantastic for aligning picture frames on sheetrock
- USB-C rechargeable with a case and cable included
Cons
- The digital angle display is faint, didn’t show on camera at all
- Pin alignment feature is useless on concrete or brick walls
- Figuring out the plate-and-pin trick isn’t obvious at first
Frequently Asked Questions
Does the digital angle finder need an app or subscription?
No app, no account, no subscription. Everything runs on the device itself, the buttons control the lasers and the digital display directly. You charge it and use it.
How do you recharge it?
It charges over USB-C with the cable that comes in the case. The listing rates the built-in battery at 2600mAh, so it’s meant for extended sessions before you need to top it up again.
What color are the lasers and can you see them easily?
Three green beams, which are easier to see than the cheaper red lasers. In my test the thrown lines were sharp and clean, even reaching further out into corners. The lasers were the strong part, unlike the faint digital screen.
Will the magnetic mount work on any surface?
Only on magnetic surfaces. Three sides of the unit are magnetic, so it sticks to steel or other ferrous surfaces and throws the laser across the room. On non-magnetic walls you’d use the metal wall mount plate with a nail or the included pins instead.
Can I use it on concrete or brick walls?
The pin alignment feature won’t work on concrete or brick, since you can’t press the little pins in. I couldn’t demo it on my own walls for exactly that reason. You’d rely on the magnetic sides or find a magnetic surface nearby.
What’s the difference between absolute and relative angle mode?
Absolute mode reads true level from zero degrees, and relative mode lets you set a reference angle anywhere. That relative Zero function is handy for matching a table saw blade or miter to an existing angle without doing the math.
Does it work for tile installation?
Yes, it works perfectly for tile work. You just skip the alignment pins and use the magnetic mounting and laser lines to keep your rows straight.
Is the tool good for woodworking and saw setups?
Yes, and it’s genuinely useful for saw setups, lock in absolute zero, dial to 10, 15, or 17.2 degrees, and the laser projects that angle without you doing any math. The catch is practical: the display is faint enough that it vanished completely on camera, so in a bright workshop you’ll need to shade it with your hand to confirm the reading. The laser does the heavy lifting; the screen is the weak link.
What comes in the box?
The unit, the metal wall mount plate, the little alignment pins, a USB-C charging cable, and a carry case. Close it all up in the case and it’s ready for the next project.
Get it now
DOVOH Digital Angle Finder With Laser
Get the best price on Amazon →This post contains affiliate links. I may earn a commission at no extra cost to you.
🛍️ Shop everything in this video
Every product mentioned, in one place — these are affiliate links, so I may earn a small commission at no extra cost to you.
🛍️ DOVOH Laser Angle Gauge — check price on Amazon →
About the reviewer
Seb and Michelle
We've tested over 6,500 products in the last 5 years - collaborating with over 4,000 brands and bringing our style of reviews to multiple platforms.